


Home » Getting Started Guide » Create and Send Invoices
teamspace supports you in digitizing all important business processes. The more processes you manage within the software, the more you benefit from the advantages of the integrated solution. We therefore recommend using teamspace to handle the entire billing process from the offer to the order to the invoice. Invoices can then be generated automatically from an order.
For cases where you would like to create an invoice without an order, we will show you how to proceed below.
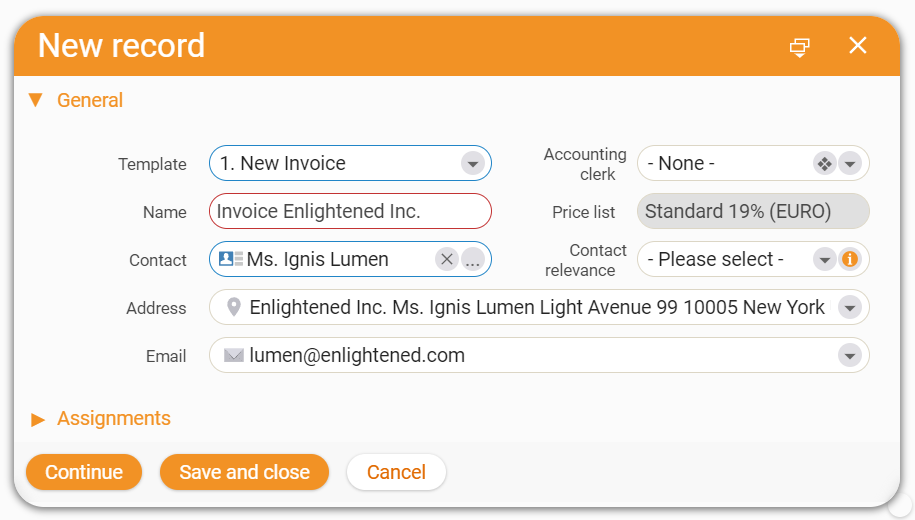
As an example we will use Ms. Ignis Lumen, to whom you want to send an invoice for the following services.
Invoices can be created in different ways. For example, switch to the “Finances” menu item and create a new invoice by clicking the “+” symbol. Select the Type Invoice.
The creation dialog for a new invoice will open. Select New invoice under Template and enter the desired name for the invoice. Then you can select the contact to whom the invoice should be addressed.
New invoices can also be created from within CRM. In the Overview of a contact or an organization, you will find the section Finance records under Last changed elements on the right side. Use the “+” button to add a new record.
The creation dialog is the same as before. If you create an invoice from an existing contact, the Contact field in the dialog will be pre-filled. Once you have entered all the necessary information, click Continue.
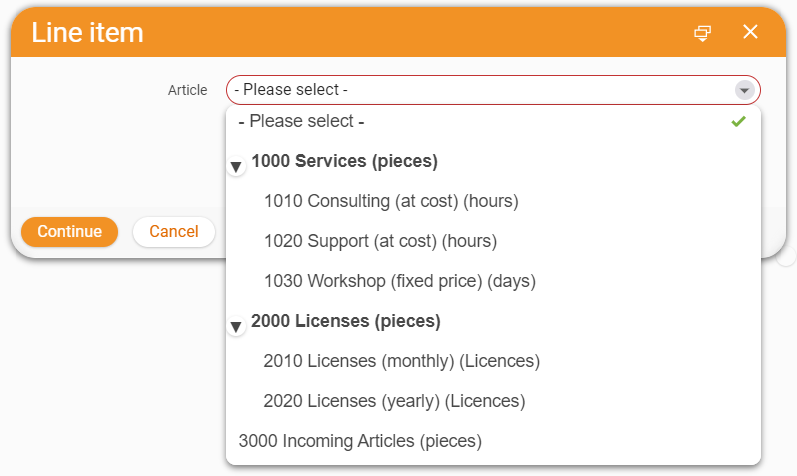
Select the item you want to add to your invoice.
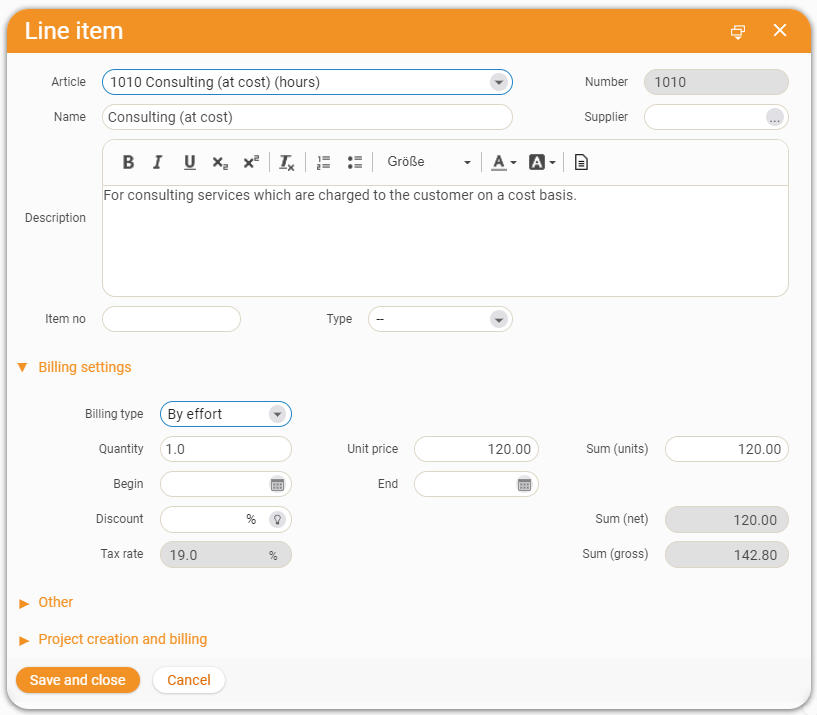
In our example invoice we select the item “1010 Consulting (at cost)”. Additional details about the item can be set in the following dialog. Certain standard information, such as the Unit price, is already pre-filled. You can adjust these if necessary. In our example, we enter the Quantity of hours to be billed.
When you have finished editing, click on Save and close.
You have now added the first item to your invoice. Now you can add more items as you wish.
When you have finished editing, you can validate the invoice by clicking the Create invoice button. This will give it an invoice number and it will not be possible to edit it further. You can use the Activate editing mode button to remove this protection again if necessary.
You can use blocks to additionally structure the items of your offer. To do this, assign blocks to individual items in your offer. This allows you to group different services and products together and distinguish them from one another.
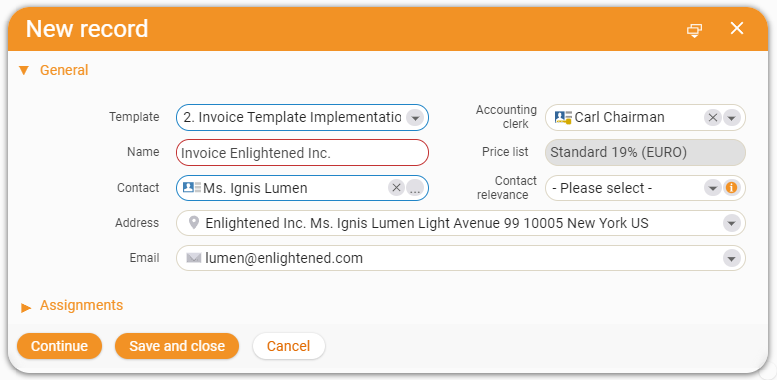
To avoid having to start from scratch with each new invoice, you can also create invoice templates. In these templates, you can preconfigure items that are frequently used in conjunction with each other and thus quickly create even extensive invoices. To do this, select a preconfigured template in the Template field in the order creation dialog.
After clicking Continue, you will get to the Invoice Items tab. Here you will find the items that have already been specified in the template. These can still be adjusted in the next step. Once you have finished editing, validate the invoice by clicking on Create invoice.
The Preview tab allows you to view your invoice in PDF format. Changes you make in the Items tab will be applied automatically. You have several options to send the invoice. If a mail account is stored in teamspace, you can send the invoice directly from the system by clicking the Send per mail button. The invoice will be attached as a PDF file and the addressee will be taken from the CRM contact of the invoice.
In the Preview tab, you can download or print the invoice as a PDF file.
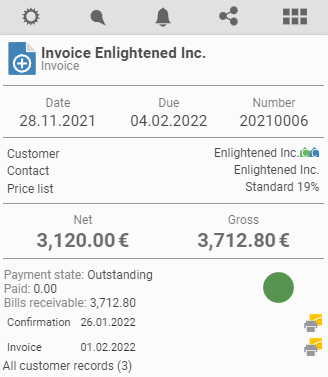
Once you have validated an invoice, teamspace will show you the associated due date. If you see a green circle in the upper left corner of the business card, the payment due date has not yet been exceeded. If the circle is red, the customer has not paid the invoice amount on time or the incoming payment has not yet been registered in teamspace via the Edit payment button.
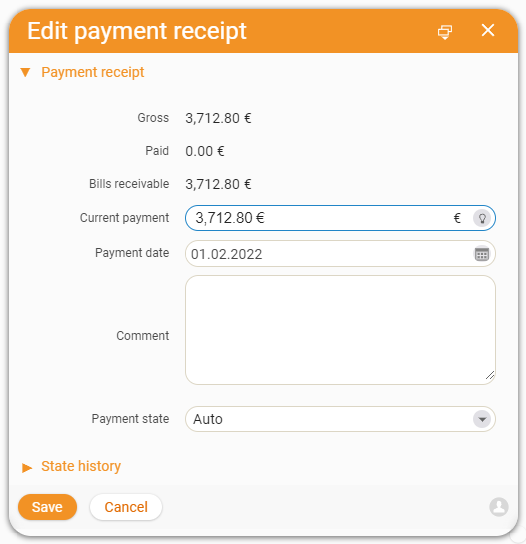
In the payment receipt dialog, you can enter the customer’s payment in the Current payment field. If this value matches the open invoice amount, the invoice is automatically considered paid in full. You can also use the Payment state field to document partial payments.
With teamspace you can also digitize your dunning process with a payment reminder and two dunning levels.
If you want to have an overview of the invoices created in the system, select the Finance button in the main menu. Here you will find the Invoice management tile. By clicking on it, you will find the current invoices including their payment status.