


Home » Getting Started Guide » Create an Order Confirmation
With the order confirmation, teamspace supports you in invoicing your goods and services. In the following, we will show you how to create a new order for which no offer has been created before.
teamspace supports you in digitizing all important business processes. The more processes you manage within the software, the more you will benefit from the advantages of the integrated solution. We therefore recommend that you handle the entire billing process from the offer to the order to the invoice with teamspace. Order confirmations can then be generated automatically from an offer.
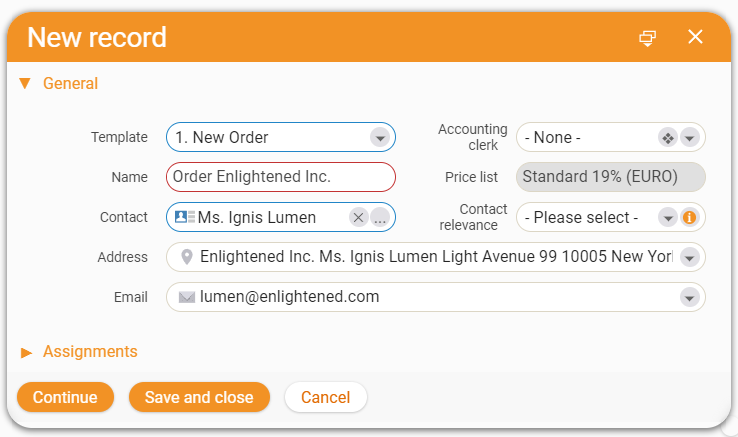
As an example we use Mrs. Ignis Lumen, who placed an order for the following services.
You can create an order confirmation in different ways. For example, select “Finance” in the main menu. Here you can create a new record by clicking on the “+” symbol. In the following dialog, set the Type to Order confirmation. Now the creation dialog for an order confirmation opens. In the Template field, select New order confirmation. Then enter the name of the order and the contact to whom you want to address it.
Alternatively, you can also create an order confirmation from within CRM. When you are in the Overview of a contact or organization, you will find the Finance records section on the right side under the Last changed elements heading. By clicking on the “+” there, you will also create new records.
The dialog is the same in both cases. By going through CRM, the Contact field is already pre-filled. When you have entered all the information, click Continue.
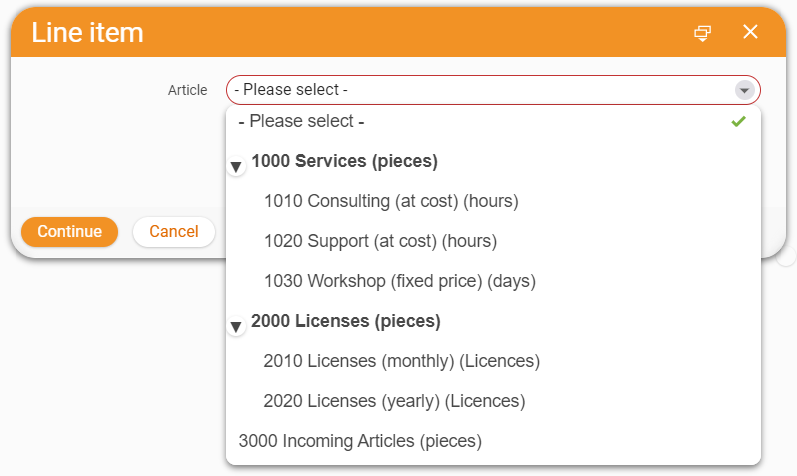
In the order, start in the Items tab. The list of items is initially empty and must be filled. Here you enter the services and goods that you would like to offer to your prospective customer. Via the “+” symbol you can open the dialog for a new item. Here you get access to the item master stored in teamspace.
Select the article you want to add.
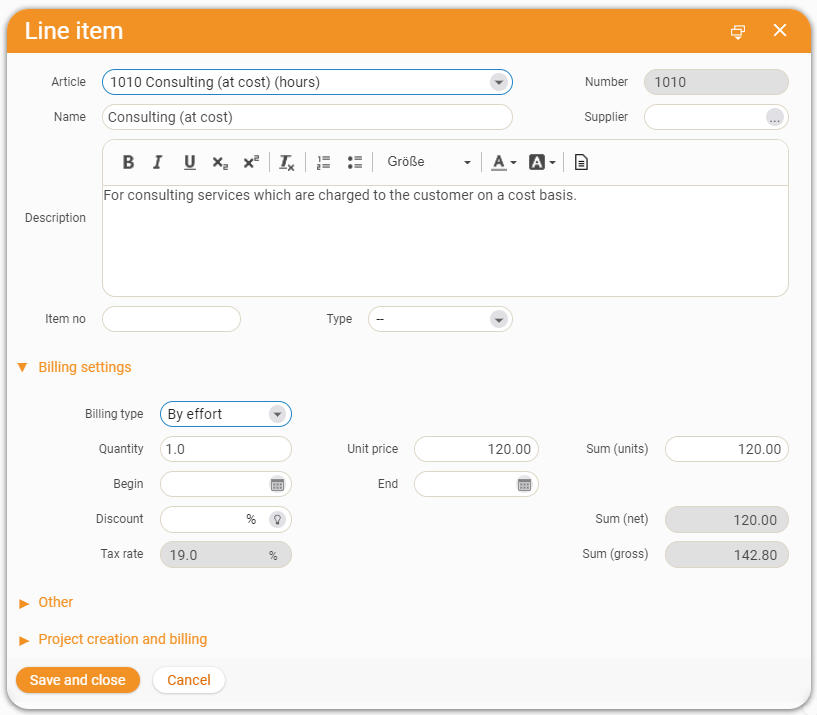
For our example we select the article “1010 Consulting (at cost)”. In the following dialog, the item will be configured. Default values, such as the Unit price, are already entered in the item. These only need to be adjusted to the wishes of the prospect. To do this, we enter the hourly value that was requested in the Quantity field.
When you have completely configured the item, click on Save and close.
You have now added the first item to your order. Repeat the described procedure until all services and goods required by the prospective customer have been created. For the license item, enter a value in the Start field in addition to the number. This corresponds to the first day of software usage by the customer.
When you have finished configuring the order, you can validate it using the Create Order Confirmation button. This will give it an official order number and protect it against further changes. Via the button Activate edit mode, you can remove this protection again.
With blocks you can additionally structure the items of your offer. To do this, assign blocks to individual items in your offer. This allows you to group different services and products together and distinguish them from each other.
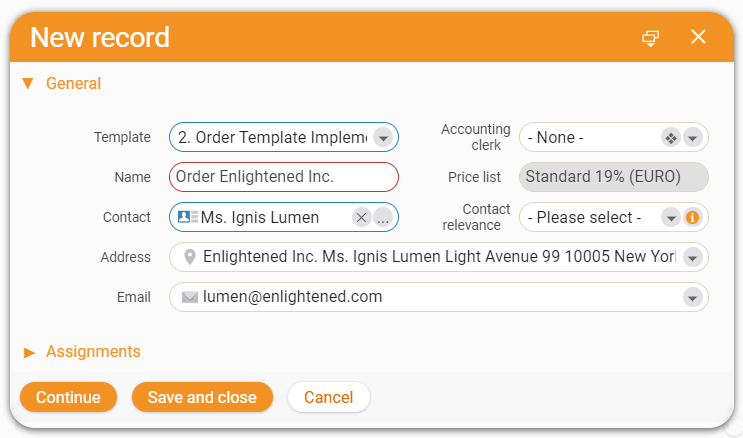
Orders often have a similar structure. You can use order templates so that you do not have to create a completely new order confirmation for each prospective customer. In these templates, related items can be preconfigured and suitable order confirmations can be created quickly. To do this, select a preconfigured template in the Template field in the order creation dialog.
If you click on Continue, you will be redirected to the item list. This is already filled with the items from the template, you just need to adjust it to the specific prospect request. When you have finished configuring the order, you can validate it using the Create order confirmation button.
In the detail manager menu you will find the Preview tab. When you select it, you will see how your order confirmation will look like in PDF format. The information you have made in the Items tab will be transferred to this document. You now have several options to send the PDF to the prospect. If a mail account is available in teamspace, you can open a ticket dialog by clicking the Send per mail button. The file will be attached automatically and the addressee of the mail will also be entered from the CRM contact of the order confirmation.
In the Preview tab, you have the option to download the PDF in order to send the file in another way. You can also print the document to send it by mail.
The items of an order give you information about the invoiceability of the goods and services.
Means that the selected item is billable.
Means that the item is not yet billable. Billing conditions that have been set must be met first.
Means that the item is fully settled.
A factor is the billing type of the item to be billed:
Fixed price
A one-time good or service is settled according to a fixed price. Items of this type are directly billable in the standard system.
According to effort
Services that are to be billed based on tracked times according to a set hourly/daily rate. Such items become billable only if project times have been tracked in teamspace.
According to time
Services or goods that are to be billed on a recurring basis at a fixed rate. These items need a start date to be billable.
By percentage
Items with this billing type can be used to map percentage markups or discounts to other items or areas.
Another factor is billing rules that can be additionally assigned to items. For example, the billability can be linked to a specific date or the status of the associated project.
An order can also be assigned billing rules. These have a higher hierarchy than the rules of the items. An order whose rules are not fulfilled is not displayed as billable, even if all the items it contains are billable.
You have many options for defining the billability rules for your orders. Among other things, you can set payment schedules for your order to bill your customers for progress payments.
If you want to have an overview of the orders created by you and your colleagues, select the Finance button in the main menu. Here you will find the tile Contract management. There you can see all current orders including their settlement status.