
teamspace helps you digitalise every key business process. The more processes you run within the software, the more you benefit from the integrated solution. We recommend running the entire revenue chain — quote, order, invoice — in teamspace. Order confirmations can then be generated from a quote automatically.
As an example, Ms. Ignis Lumen has placed an order for:
- 16 hours of consulting
- A one-day user training
- 10 monthly software licences
1. Creating an order confirmation
You can create an order confirmation in several ways. Open Finance in the main menu, click the ”+” symbol to create a new document, and in the dialog set the type to Order confirmation.
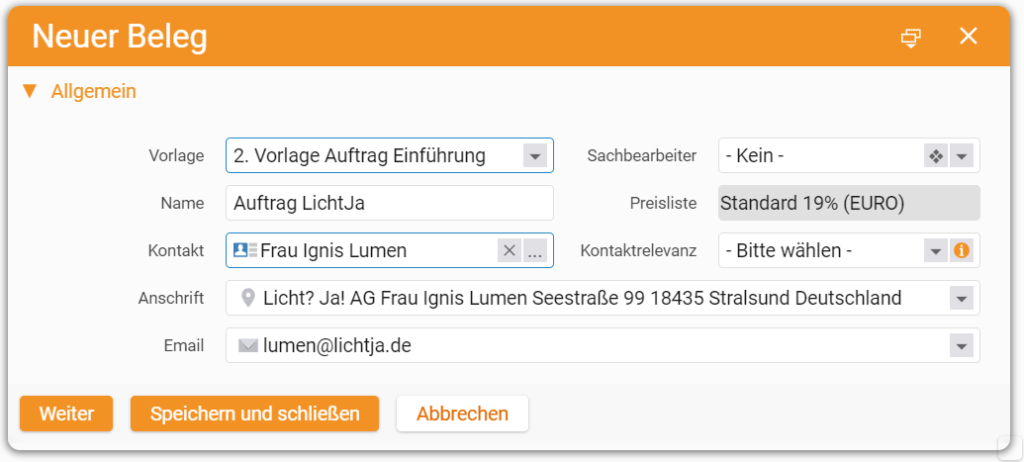
The creation dialog opens. In the template field choose New order confirmation. Enter the order name and the contact you address it to.
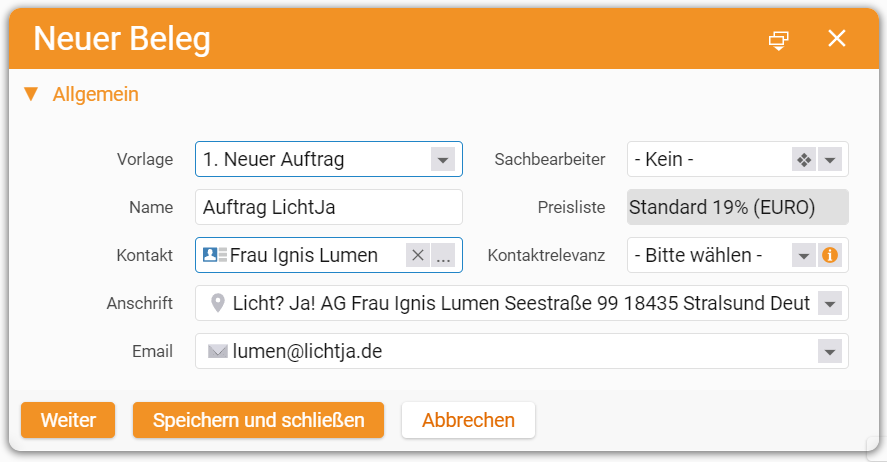
You can also create an order confirmation from the CRM. In the Overview of a contact or organisation, on the right under Recently edited items, you find the Documents section. Click the ”+” there.
In both cases the dialog is the same. Coming from the CRM, the contact field is pre-filled. Click Next when finished.
2. Adding line items
The order opens on the Items tab. The list of items is empty and has to be filled with the products and services you are confirming. The ”+” symbol opens the dialog for a new item, giving access to the article master.
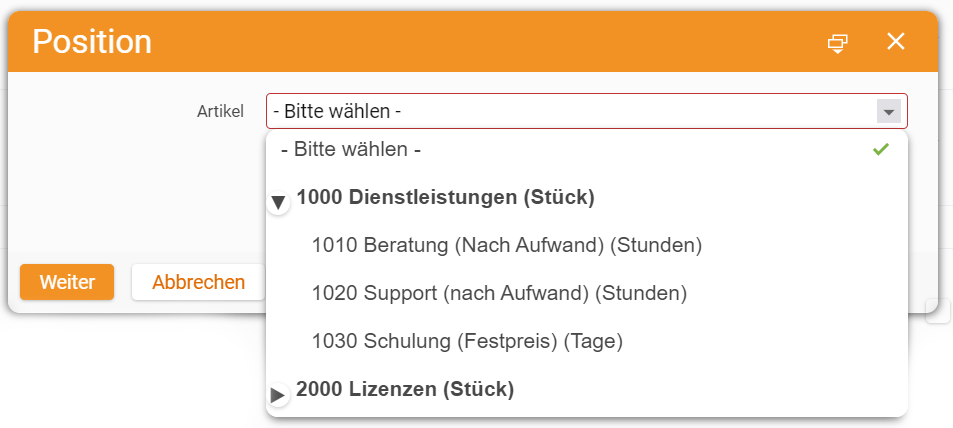
Select the article you want to add. For our example we pick “1010 Consulting (hour)”. The next dialog configures the item. Defaults like the unit price are pre-filled — adjust to the case. In quantity we enter the requested hours.
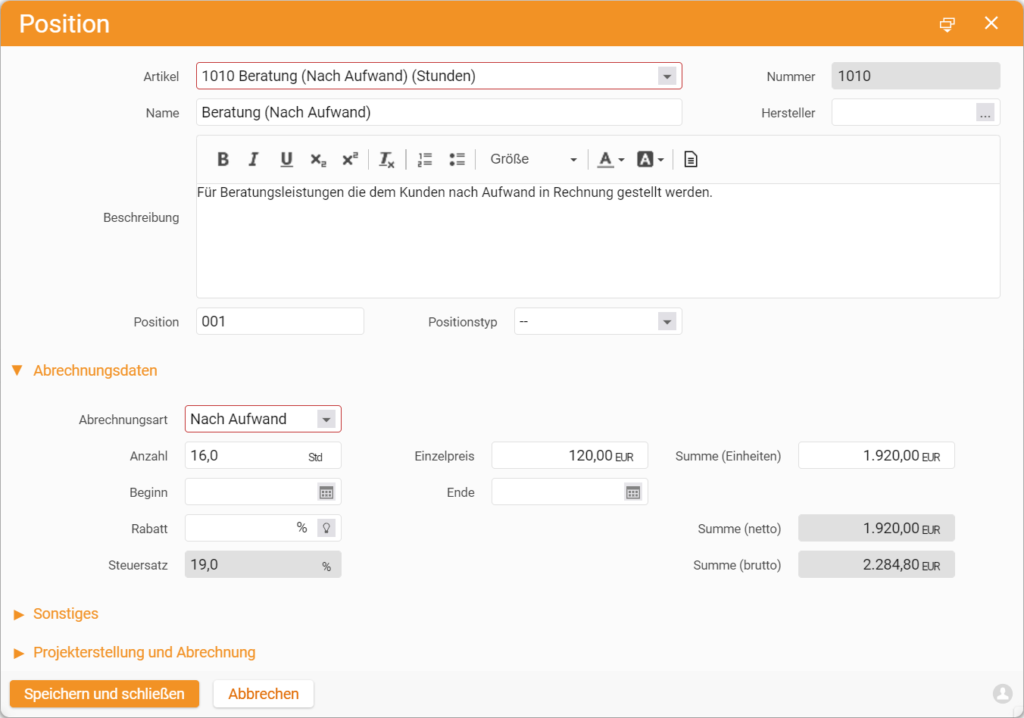
When the item is fully configured, click Save and close.
Repeat until every requested product or service is on the order. For the licence item, also enter a start date — this is the first day of the customer’s software use.
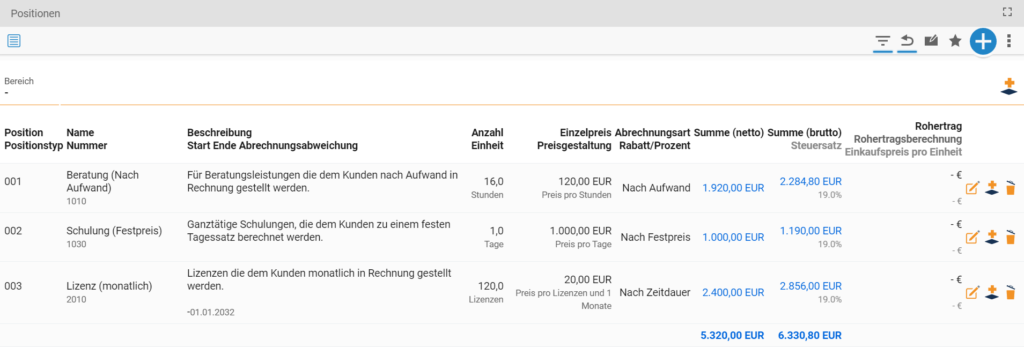
Once the order is finalised, click Create order confirmation to validate it. The order receives an official number and is protected from further changes. Enable edit mode lifts that protection.
With sections you can structure items further by grouping related products or services.
3. Creating an order from a template
Orders often share a similar structure. Instead of building from scratch, you can use order templates. They pre-configure related articles. In the creation dialog, pick a configured template in the Template field.
Click Next to land in the items list — already filled from the template, ready to be adjusted to the specific case. When done, validate with Create order confirmation.
4. Sending the order confirmation
In the detail manager menu you find the Preview tab showing the order confirmation as a PDF. With a mail account configured in teamspace, Send by mail opens a ticket dialog with the file attached and the recipient pre-filled from the CRM contact. From the same tab you can also download the PDF or print for postal dispatch.
5. Billability of order items
Item rows show their billability status:

means the item is billable.

means the item is not yet billable. Defined billing conditions still need to be met.

means the item is fully billed.
A key factor is the billing type of the item:
Fixed price — A one-off product or service billed at a fixed amount. By default these items are immediately billable.
Time and material — Services billed based on captured hours at a defined hourly or daily rate. Such items become billable only once project times have been logged in teamspace.
Recurring — Services or goods billed in a recurring cycle. These items need a start date to become billable.
Percentage — Articles of this type are used to model percentage surcharges or discounts on other items or sections.
A second factor are billing rules that can be assigned to items. Billability can, for example, be linked to a date or to the status of the related project. Orders themselves can also carry rules — these take priority over the item rules. An order whose rules are not met will not appear as billable, even if every individual item is billable.
You have many options to define the billing modalities of your orders, including payment plans that allow you to bill instalments.
6. Overview of existing orders
For an overview of the orders you and your colleagues have created, select Finance in the main menu and open the Order billing tile. There you see every current order with its billing status.
More getting-started guides
- Learn the user interface
- Add a contact
- Create a project
- Log project time
- Quote workflow
- Invoice workflow
- End-to-end process guide
Reviewed in a requirements check
You have questions about the rollout? In a 15- to 30-minute meeting we discuss your specific requirements, free of charge and without obligation.