
Invoices in teamspace
For cases in which you want to create an invoice without a prior order, the following guide shows you how to do it.
As an example, Ms. Ignis Lumen receives an invoice for:
- 16 hours of consulting
- A one-day user training
- 10 monthly software licences
1. Creating an invoice
Invoices can be created in several ways. Open Finance in the main menu and click the ”+” symbol to create a new invoice. Set the type to Invoice.
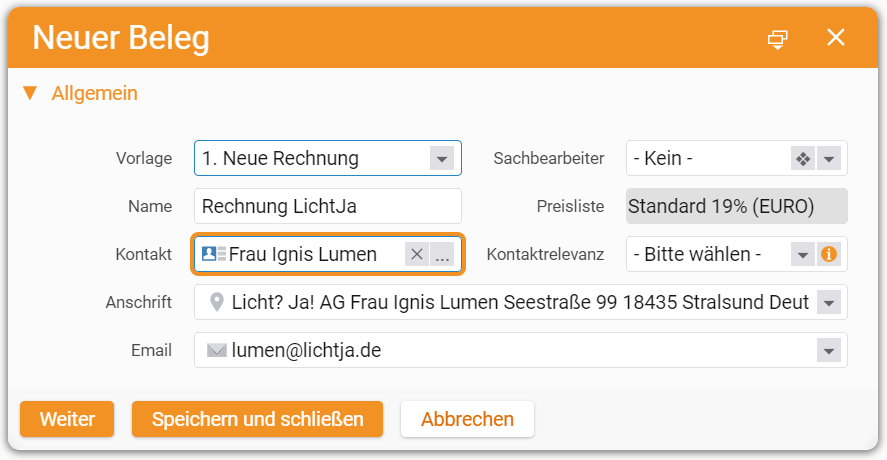
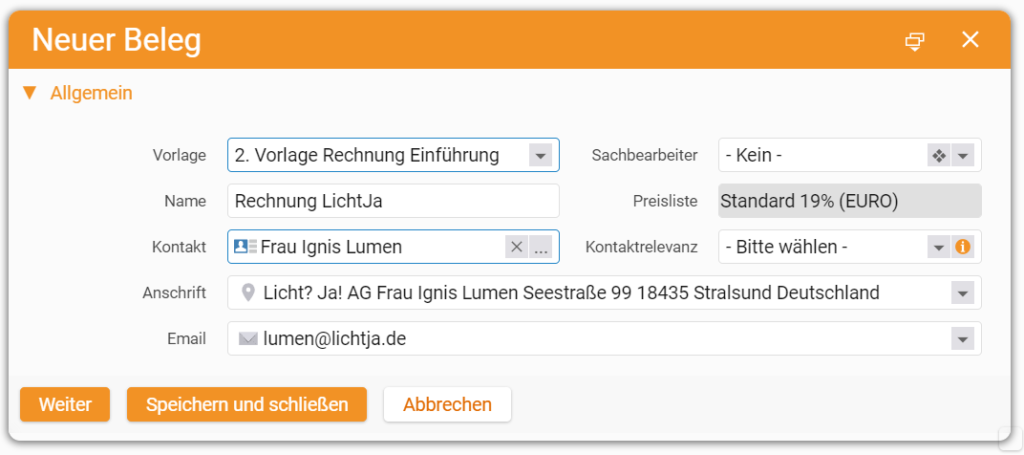
The creation dialog opens. In the template field choose New invoice and enter the desired invoice name. Then select the contact the invoice is addressed to. If your tenant is configured accordingly, e-invoices in ZUGFeRD format are created automatically.
You can also create new invoices from the CRM. In the Overview of a contact or organisation, in the Recently edited items area on the right, you find the Documents section. Click the ”+” button to add a new document.
The creation dialog is the same as above. Coming from a contact, the contact field is pre-filled. Once everything is entered, click Next.
2. Adding line items
Pick the article you want to add to your invoice.
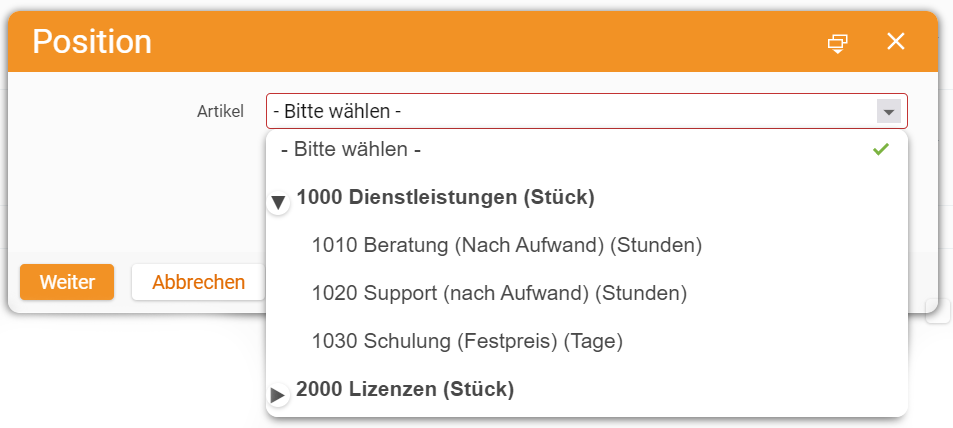
In our sample invoice we pick “1010 Consulting (hour)”. The next dialog details the item. Defaults like the unit price are pre-filled — adjust as needed. In quantity we enter the billable hours.
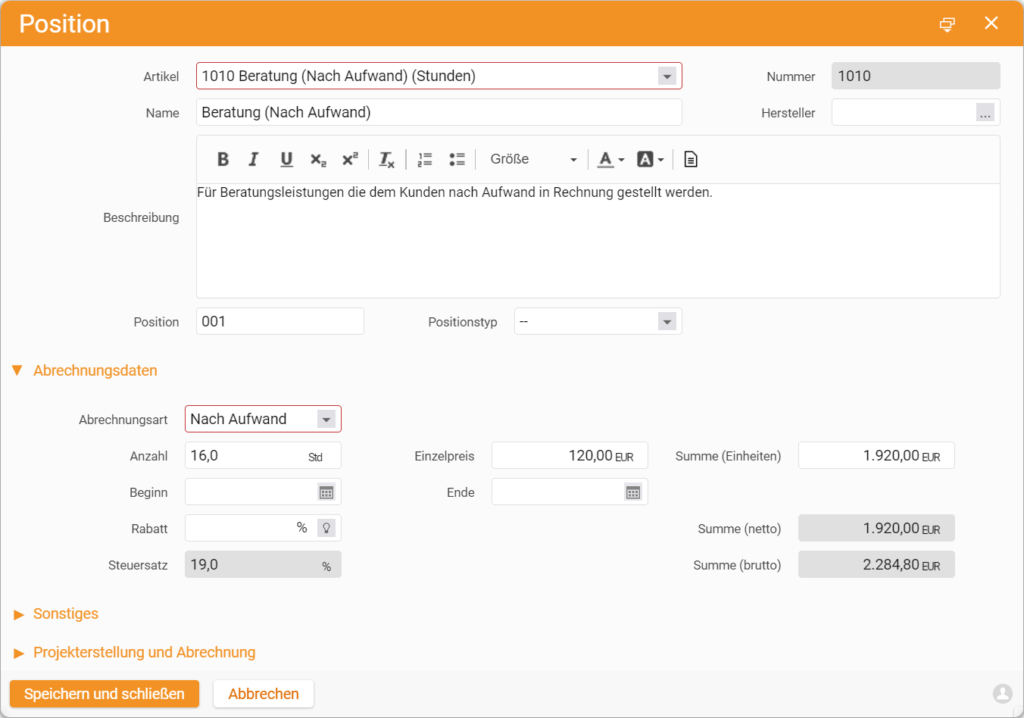
When done, click Save and close.
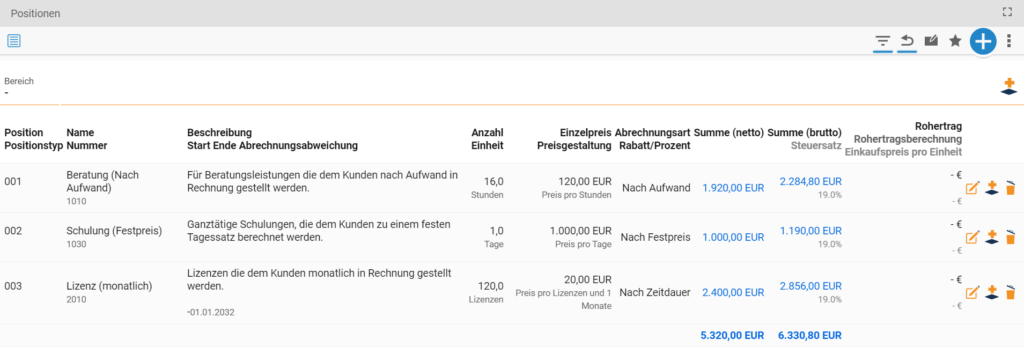
You have now added the first item. Add more items as needed.
Once finalised, validate the invoice with Create invoice. The invoice receives an invoice number and is locked for further changes. Enable edit mode lifts that protection.
With sections you can structure the items further. Assign items to sections to group and separate different services or products.
3. Creating an invoice from a template
So you do not need to start from scratch every time, you can use invoice templates. They pre-configure recurring articles for fast reuse on large invoices. In the creation dialog, pick a configured template in the Template field.
Click Next to reach the items tab — already filled from the template, ready to be adjusted to the specific case. Validate with Create invoice.
4. Sending the invoice
In the detail manager menu you find the Preview tab showing the invoice as PDF. With a mail account configured in teamspace, Send by mail opens a ticket dialog with the file attached and the recipient pre-filled from the CRM contact. The Preview tab also lets you download the PDF or print for postal dispatch. With ZUGFeRD active the PDF carries a machine-readable XML, ready for the recipient’s accounting system. More on the e-invoicing page.
5. Invoice due dates
Once validated, teamspace shows the invoice due date. A green circle in the upper left of the business card means the payment due date has not been exceeded. A red circle means the customer has not paid on time, or the payment has not yet been recorded via the Record payment button.
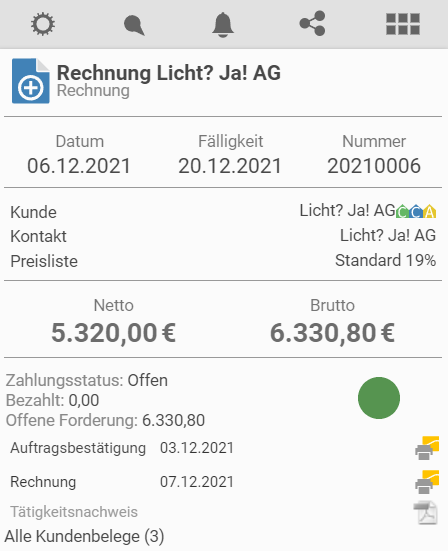
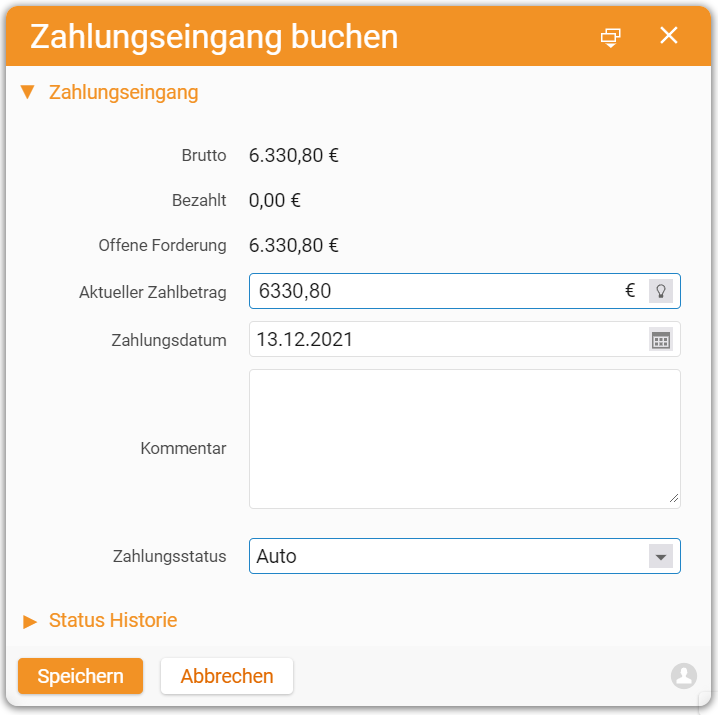
In the booking dialog, enter the received amount in the current payment field. If it matches the open invoice amount, the invoice is marked fully paid. The payment status field also supports partial payments.
teamspace lets you digitalise your dunning process with one payment reminder and two escalation stages.
6. Overview of existing invoices
For an overview of all invoices in the system, select Finance in the main menu and open the Invoice management tile. There you find all current invoices including their payment status.
More getting-started guides
- Learn the user interface
- Add a contact
- Create a project
- Log project time
- Quote workflow
- Order confirmation
- End-to-end process guide
Reviewed in a requirements check
You have questions about the rollout? In a 15- to 30-minute meeting we discuss your specific requirements, free of charge and without obligation.